Enabling web-based file transfers
MFT Server includes a client named MFT Server Web Client.
MFT Server Web Client:
-
Is a browser-based file transfer client that uses the HTTP/S protocol.
-
Is designed for Users that you create in the MFT Server Manager. It lets the Users easily upload and download files.
-
Is part of an MFT Server installation. If you have installed MFT Server, the client is automatically available for your use. Please note, some configuration is required.
The MFT Server Web Client has all the common functions of a file transfer client without having to install and manage the client software on your MFT Server User's computers. Additionally, since the MFT Server Web Client communicates via HTTP/S, you can easily provide your Users with secure file transfer capabilities without having to manage complex customer firewall issues often associated with FTP/SFTP protocols. Web-based file transfers
The Steps below describe what must be configured before your Users can use the MFT Server Web Client to upload and download files.
Step 1. - Enable HTTP/S services
In the MFT Server Manager UI, navigate to the Settings > MISCELLANEOUS > Web > Web tab, as shown in the image below. Displayed is a set of options for enabling HTTP/S services.
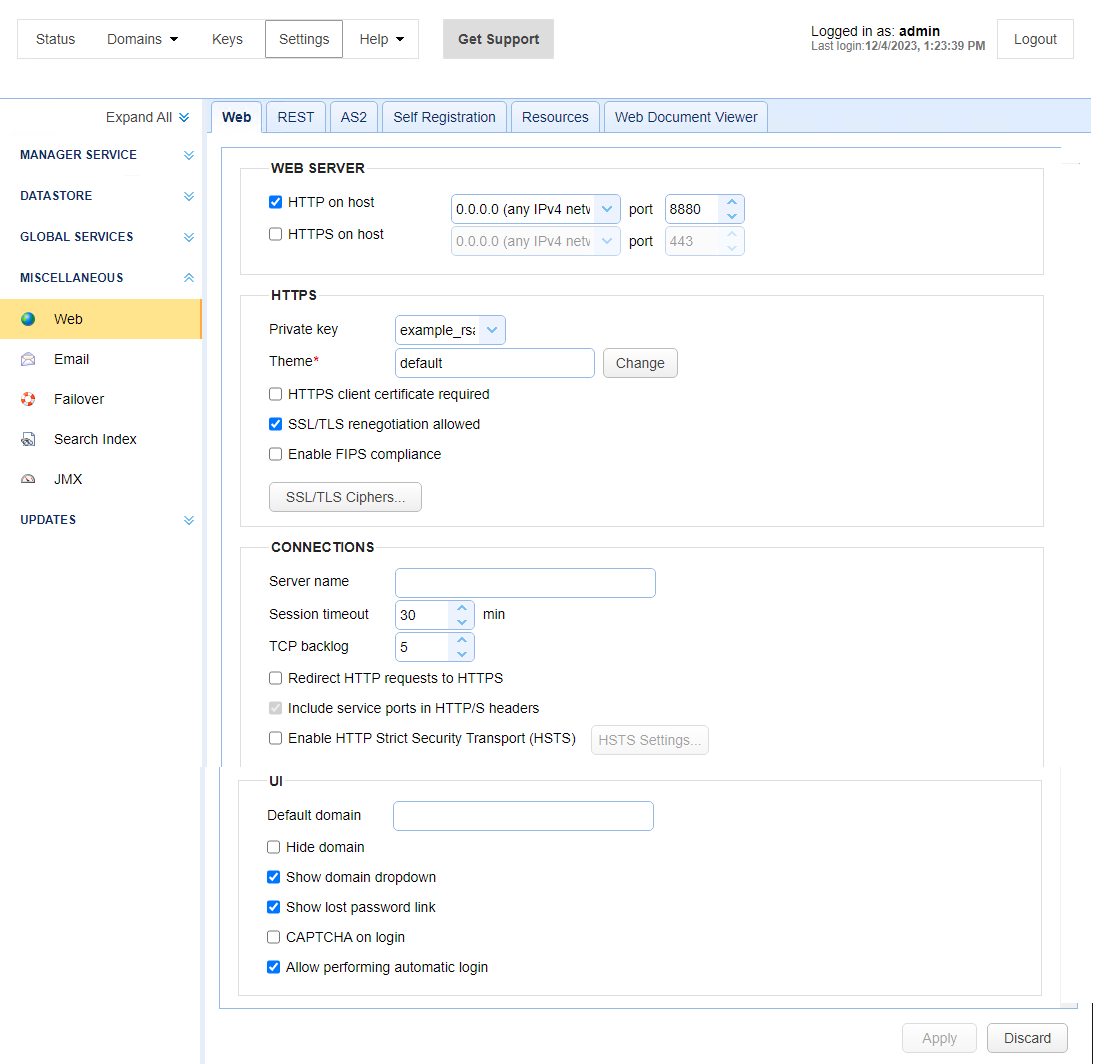
WEB SERVER
HTTP on host - The host and port you want to enable HTTP service on. This will also be used for client REST services.
HTTPS on host - The host and port you want to enable HTTPS service on. This will also be used for client REST services.
HTTPS on host isn't an available option in the above dialog window for SaaS environments. This is where it gets a bit counter-intuitive. To ensure HTTPS works correctly, you must select HTTP on host. We understand this seems contradictory, but it is the necessary selection for the MFT Server Web Client to establish a secure HTTPS connection within the JSCAPE SaaS environment.
HTTPS
Private key - The SSL encryption key to be used for HTTPS services.
Theme - The color theme used for the MFT Server Web Client log in page.
To change the theme, click on the Change button to the right of the Theme field. After doing so, the following will occur:
-
A panel will appear on the right-hand side of the page displaying all the themes in individual boxes that you can choose from.
-
The current theme in the Theme field will temporarily be applied to the MFT Server Manager. This serves as a visual aid allowing you to see what the current theme looks like for the MFT Server Web Client log in page.
To select a theme, click on the desired theme's box. After doing so, the selected theme will temporarily be applied to the MFT Server Manager, allowing you to preview what it will look like if applied to the MFT Server Web Client log in page. To save a selected theme, click anywhere outside of the theme panel. After doing so the Theme field will update with the theme name you selected, and the MFT Server Manager's theme will revert to its currently configured theme. Click the Apply button to save the theme, or alternatively click the Discard button to cancel.
Note: To learn how to set the theme for the MFT Server Web Client application (not the log in page), see the theme topic in the MFT Server Web Client section.
HTTPS client certificate required - Requires that client browser successfully identify itself with a client certificate found in "Client keys" section of Key Manager.
SSL/TLS negotiation allowed - If enabled, clients will be allowed to renegotiate SSL/TLS sessions.
Enable FIPS compliance - Enables FIPS compliance for HTTP/S connections. This ensures that any file transfers performed through the MFT Server Web Client uses FIPS. See below additional configuration requirements for FIPS to work.
SSL/TLS Ciphers - List of enabled SSL/TLS ciphers for HTTPS communications.
CONNECTIONS
Server name - Optional value if entered will replace any HTTP headers that contain hostname data with specified hostname. This is useful in cases where server operates behind a NAT enabled firewall and you do not want to leak internal hostname or IP address information.
Session timeout - The amount of time after which to close inactive HTTP/S sessions.
Redirect HTTP requests to HTTPS - Redirect incoming HTTP requests to secure HTTPS service.
Include service ports in HTTP/S headers - If checked (default), service ports will be included in HTTP/S headers.
Enable HTTP Strict Security Transport (HSTS) - If enabled, HSTS will be enabled.
UI
User interface - Sets what user interface options are available from login page.
Default domain - Defaults domain field to specified value when logging in via web interface.
Hide domain - Hides domain field when logging in via web interface. If this option is checked then a default domain MUST be provided.
Show domain dropdown - If checked a drop-down of all available domains is displayed for the Domain field when logging in via the web interface, otherwise a text field is displayed requiring user to type in domain.
Show lost password link - If checked the Lost password link will be displayed on web interface login page allowing user to reset their password via email.
CAPTCHA on login - If checked the user will be required to enter a CAPTCHA on login.
Allow performing automatic login - If checked, automatic logins are allowed. See Performing automatic login for more details about this feature.
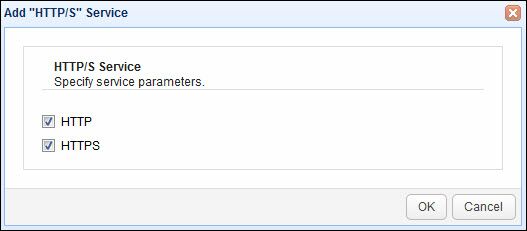
Step 2. - Add HTTP/S services to your Domain
For the desired domain go to the SERVICES > Listeners > Listeners grid and click the Add button. When prompted set the Protocol to HTTP/S and select the desired protocols you wish to accept file transfers for.
See also
Obtaining a trusted certificate