Web user interface
MFT Server Web Client has all the common functions of a file transfer client without having to install file transfer client software on your end-users computers. All user permissions and virtual paths are observed when using the MFT Server Web Client.
To log in to the Web Client, the user needs to enter the following fields, as depicted in the image below.
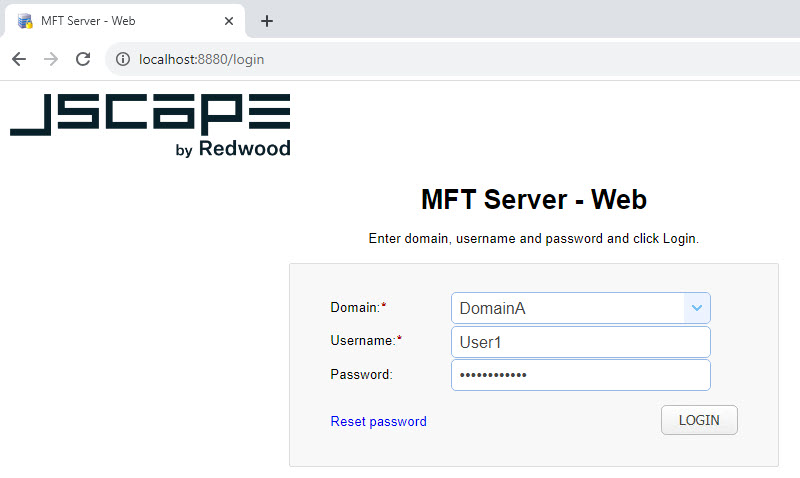
Domain - The name of the domain to connect to. This is the name of the MFT Server domain that the User was created in. The MFT Server Manager UI provides a list of Domains, which is accessible by navigating to Domains > View domains. See the Domain Name column in the grid. Each Domain has its own set of User Accounts. See ACCOUNTS > Users. The Username entered in the above field would have been created in a specific domain, in the ACCOUNTS module.
Username - The account username.
Password - The account password.
If the user clicks on Reset password, a Lost password page will appear. After they enter their username and click Reset Password, an email associated with the username will be sent out, providing instructions on how to reset the password.
After successfully logging in, the My Storage tab is enabled by default, as depicted in the image below. My Storage displays the files and directories that are accessible to the user on the MFT Server. The real location of the files and directories is determined by the one or more virtual paths configured for the logged in user, or the one or more virtual paths configured on the group-level that the logged in user is a member of. An MFT Server Administrator manages the assignment of a user's virtual path(s).
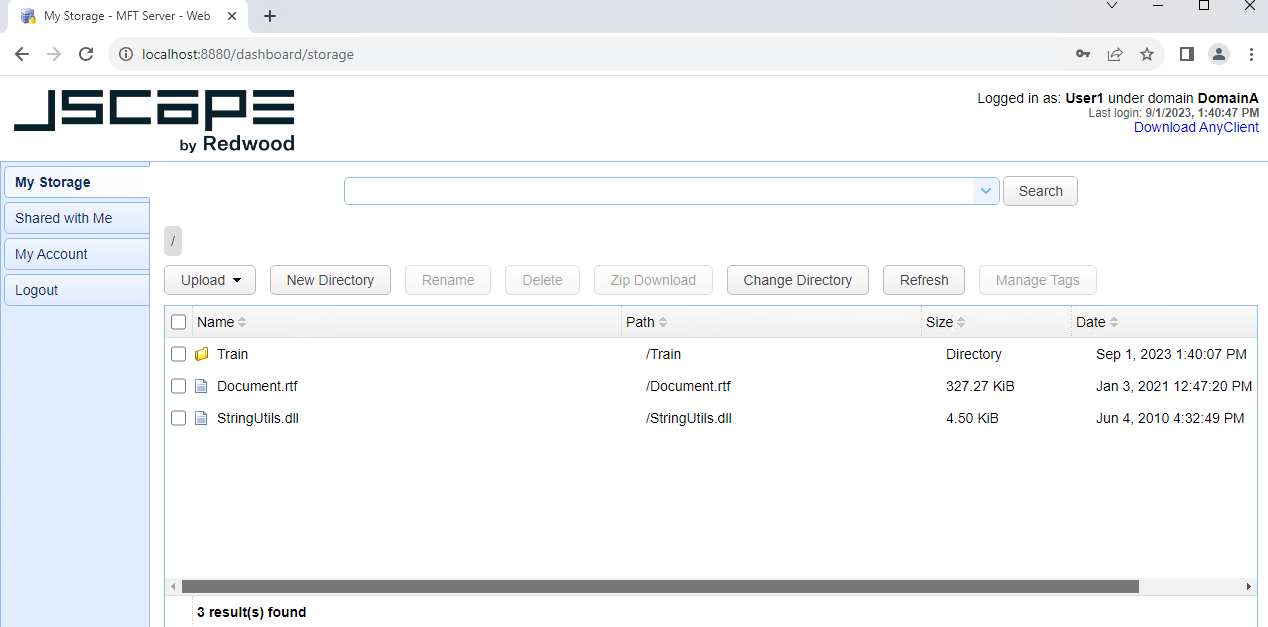
My Storage
The buttons described below list the actions a logged in user can take against files or directories made accessible to them on the MFT Server, providing they have been granted the appropriate permissions. For example, to delete a file, the user would require the Delete file permission granted, or to navigate to a directory (Change Directory), the user would need the Browse sub-directories permission granted. See Defining virtual paths and Virtual path permissions for more information. Note: Where applicable, the same button actions are accessible as right-click menu options.
Upload
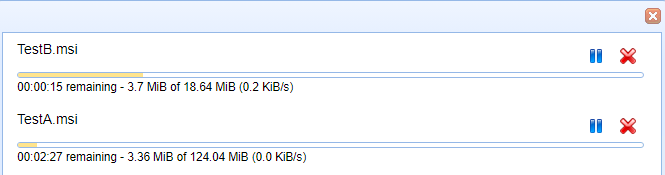
This option allows you to select file(s) to upload to the MFT Server. After clicking the Upload button, a file selector window will appear, allowing you to choose the file(s) to upload. While the upload is in progress, a list of the selected file(s) and the current time remaining to upload each file will appear, as depicted in the image below. Before an upload completes, you have the option to remove or pause/resume the upload of a selected file. To pause the upload, click on the pause || icon (which flips to the resume icon, whereupon you can resume the upload when ready). To remove (cancel) the upload, click on the remove X icon. Note: If you opt to pause the upload of a file, you must resume it before a session timeout occurs. If a timeout does happen, you would have to start the upload over again.
Lastly, if you mouse over the down arrow to the right of the Upload button, you have to option to select ASCII or Binary (the mode in which to upload the file). ASCII transfers the files as regular text, and binary transfers the file as binary data instead of text data.
New Directory
This button allows you to create a new directory on the MFT Server, which will be accessible from the My Storage list.
Rename
This options allows you to rename a file or directory that you have selected in the My Storage list. It is renamed on the MFT Server.
Delete
This options allows you to delete file(s) or directory(s) that you have selected in the My Storage list. It is deleted on the MFT Server.
Zip Download
This option zips up one or more files/directories selected in the My Storage list, and places the resultant zip file in the user's download directory. The file name follows this pattern: archive_<mm_dd_yyyy>_<hr_mi_ss>.zip.
Change Directory
This option allows you to change the directory by entering the name of a directory listed in My Storage. If the path is valid, the system will change to that directory. You can also change a directory by double-clicking on it. As you change directories, your current directory is displayed above the Upload button. To navigate back to the root directory, select the Change Directory button and enter the path as such: /. Or, you can use the currently displayed directory to navigate back to the root by clicking on the leftmost /.
Refresh
This option refreshes the list of directories and files to include the latest activity. For example, after performing an upload, click the Refresh button so the uploaded file(s) and/or uploaded directory(s) will appear in the list. As another example, click the Refresh button so any new file(s) or directory(s) made available on the MFT Server for the user to access will appear in the list.
Manage Tags
This option allows you to tag files or directories, in order to group them for easy retrieval. To create a tag, select one or more files or directories in the My Storage list, then click on the Manage Tags button. A Manage Batch Tags dialog will appear. The items you selected will be displayed in a read-only Document list. Below the Document list is a Keywords field. You can enter one or more keywords you wish to assign to the documents. If you enter a keyword that already exists, the selected documents(s) will be added to the existing list of documents assigned to the keyword. Keywords are displayed at the bottom of the UI, under the list of My Storage files. To see the keyword(s) for a specific file or directory, select the desired item in the My Storage list, then select Manage Tags. The Keywords field will display values (if any) that are associated with the selected file or directory. Tags are removed from the list when you delete all the files/directories using the keyword, or when you remove the keyword from each file and/or directory that is using it.
If you single-click on a keyword at the bottom of the UI, only the tagged files associated with the keyword will appear in the My Storage list. You can also use the Search dropdown dialog to Search on file tag, then enter the name of the tag. To remove the search filter and see all the files again, click the "X" to the right of the Search Results label (displayed above the Upload button), or click on the "X" in the search bar.
Download - Note: Download is not accessible using a button (only Zip Download is). The Download operation is accessed as a right-click menu option.
To download a single file from the MFT Server, select the desired file in the My Storage list, right-click, then select the Download menu option. The file will be downloaded and placed in the user's Download directory. The Download operation only downloads one file. Note: Multi-selecting files for download only works with the Zip Download menu option or button. Zip Download is also the operation used when downloading a directory.
My Account
If you click on My Account on the left-hand side of the page, you will see information related to your account, as depicted in the image below.
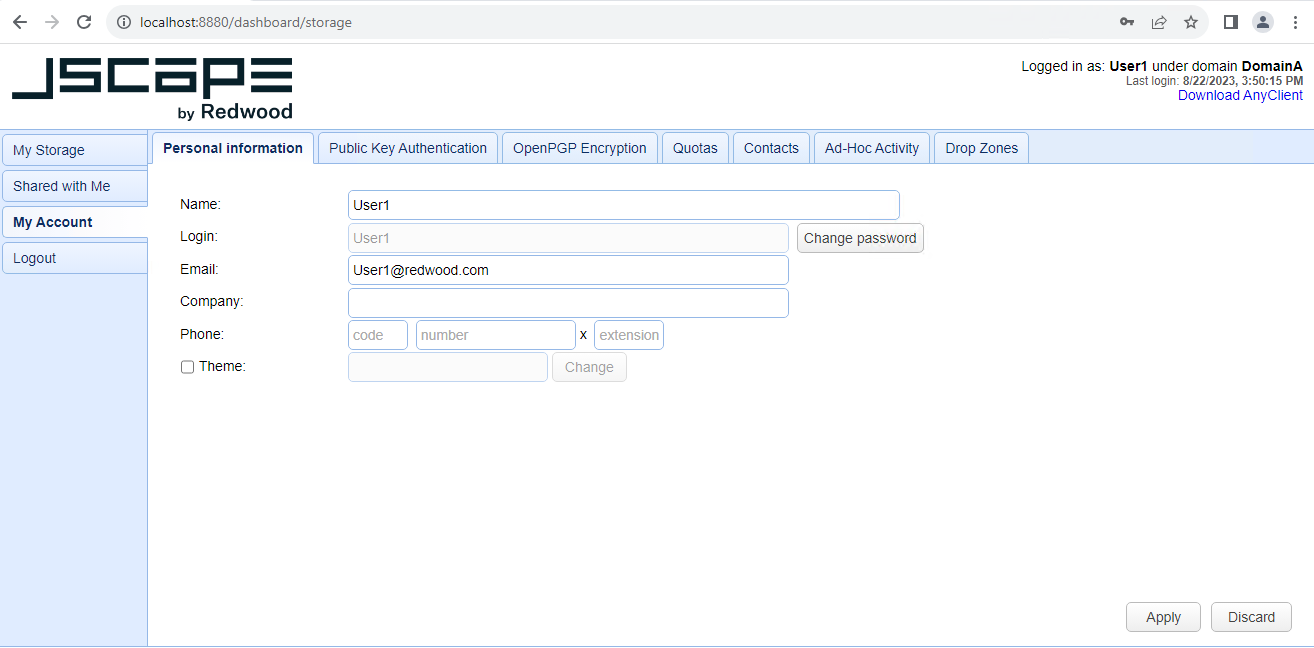
Personal Information
This section is available to all users and may be used to update the name, email address, company name, phone number, theme, and password for a user account.
Theme - This is the theme used for the MFT Server Web Client application (excluding the log in page).
The theme field is initially blank for a new user. When blank, the theme configured in the MFT Server Manager is used, set on the Domain associated with the user, under SERVICES > Listeners > HTTP/S. To change the application theme for the individual MFT Server Web Client user, click on the check box to the left of the Theme field, then click on the Change button. A theme panel will appear on the right-hand side of the page, displaying custom colors at the top of the panel, followed by all the preset themes, displayed in individual boxes, that you can select from.
Selecting a preset theme with no color customization:
In the theme panel, click on the box of the desired preset theme. After making a selection, the MFT Server Web Client UI's theme will update temporarily to display the currently selected theme so you can preview it before committing to the change. When you find a theme you like, click anywhere outside of the theme panel, which will revert the Client UI back to its current theme (until you save/refresh the UI). You will also see your currently selected theme updated in the Theme field. To save your theme choice, click on the Apply button, or alternatively click on the Discard button to cancel the selection. If you save your selection, you will need to refresh the browser to see the new theme take effect.
Selecting a preset theme and customizing it:
This option is used to customize one of the preset themes available in the theme panel. First, select a theme that you would like to customize. Next, access the Custom Colors section of the theme panel and determine which item(s) you want to change (e.g. Panel text, Panel border, etc.). Click on the color box associated with the item you wish to customize. Select the desired color from the displayed choices. After you are satisfied with your one or more color customizations, click the Set Custom button. After doing so, the theme panel will be removed, the Theme field will display the name of your selected theme followed by "custom" - e.g. metro-gray (custom), and the MFT Server Web Client UI's theme will revert to its current theme (until you save/refresh the UI). Click the Apply button to save the custom theme or click the Discard button to cancel the theme change. If you save your selection, you will need to refresh the browser to see the new theme take effect. If the customized theme field is later modified and replaced with a new theme (customized or not), the prior customized theme, no longer in use, will return to its original (factory default) preset color scheme.
Note: The theme used for the MFT Server Web Client log in page is set in the MFT Server Manager UI, configured in Settings > MISCELLANEOUS > Web > Web tab
Public Key Authentication
This section can be used to generate a key pair for use in public key authentication (SFTP). When generating a key pair or importing a public key the public key is automatically placed in the .ssh/key.pub file relative to the users root login directory on the server. When generating a key pair the user is prompted to store the private key on their system. Note, private keys should never be stored on the server, except for purposes of connecting to other remote servers.
OpenPGP Encryption
This section can be used to generate an OpenPGP key pair for use in encrypting files uploaded to virtual directories.
Domain Administration
This section is only available to domain administrators and may be used to manage users.
Quotas
This section displays any bandwidth quota or directory monitor quota information for the user.
Contacts
This section can be used to manage contacts for use in ad-hoc file transfers.
Ad-Hoc Activity
This section can be used to manage ad-hoc activity executed by the user (Email, Internal and Copy Link).
Drop Zones
This section shows drop zone information for the user (if any have been configured for the user, which is done using the MFT Server Manager UI). The drop zone URL can be obtained by selecting a drop zone in the grid, then clicking on the Copy Link button. When accessing the Drop Zone's URL in a web browser, the user can upload files by selecting the Upload button, or by dragging and dropping files to the "Drop files here" section of the web page. After initiating an upload, a status bar will appear, depicting the upload time remaining. In addition, the status bar offers pause/resume and cancel features.
Note: When accessing the drop zone via the web browser, the user may be required to enter a password. This depends on whether the drop zone, created in the MFT Server Admin UI, requires a password (see Domain > SHARING > Drop Zones).
See also