Azure AD Example using SAML
This section describes how to integrate MFT Server Web SSO using SAML with Azure AD. This example provides step-by-step instructions on how to set up the application in Azure AD and in the MFT Server Manager interface. When complete, an MFT Server user will be able to log in to the MFT Server Web Client application using Azure AD. The images provided under the Azure AD Instructions are taken from the Azure AD application. Most images are snippets and not the complete page.
Azure (AD) Instructions
Integrating JSCAPE Web SSO (SAML) with Azure AD requires adding an application in Azure AD from its own app gallery. The application that will be added is called Azure AD SAML Toolkit, which comes from Microsoft. The steps below will show how to add said application and configure it to work when signing into the MFT Web Client.
-
Log in to your Azure Portal and click on the
Azure Active Directoryicon. -
On the
Default Directoryscreen, click on theEnterprise applicationsitem under theManagesection located on the left-hand side of the page.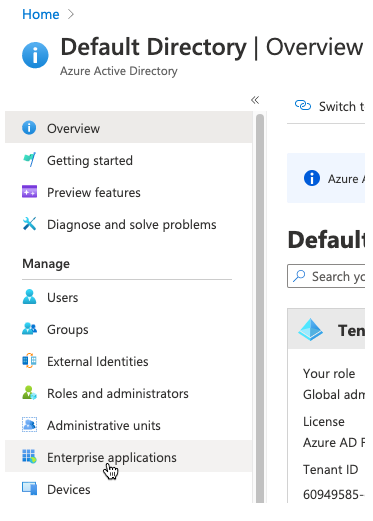
-
On the
Enterprise applicationsscreen, click onNew application.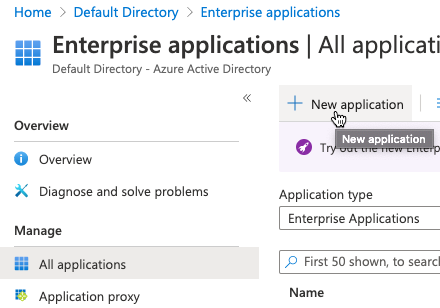
-
On the
Browse Azure AD Galleryscreen, enterAzure AD SAML Toolkiton the Search application field, then click on theAzure AD SAML Toolkitapplication when it appears in the results list.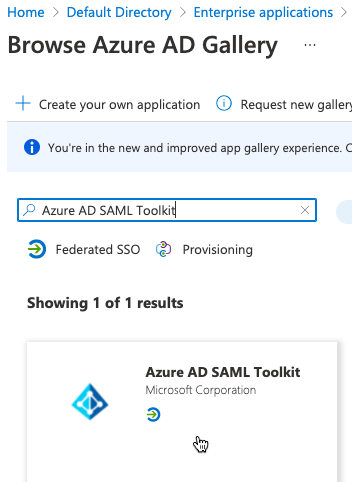
-
Enter an appropriate name in the
Namefield (in this example, the name is ActiveMFT SSO SAML). Next, click on theCreatebutton. It may take a few seconds for the application to be added. Wait until the next screen appears.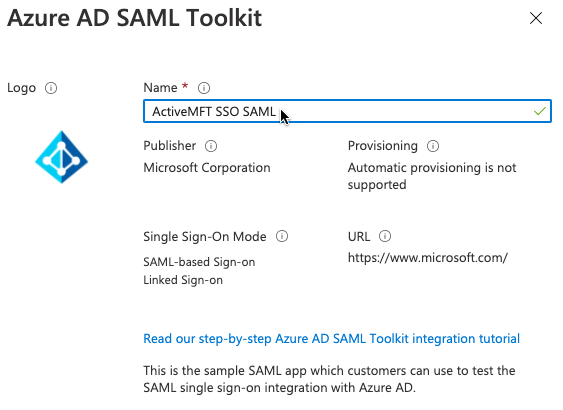
-
Click on
Single sign-onitem under theManagesection found on the left-hand side .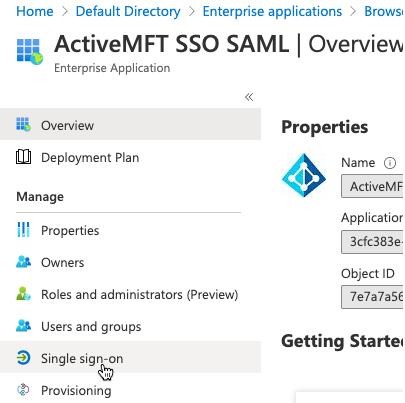
-
Click on the
SAMLoption underSelect a single sign-on methodscreen.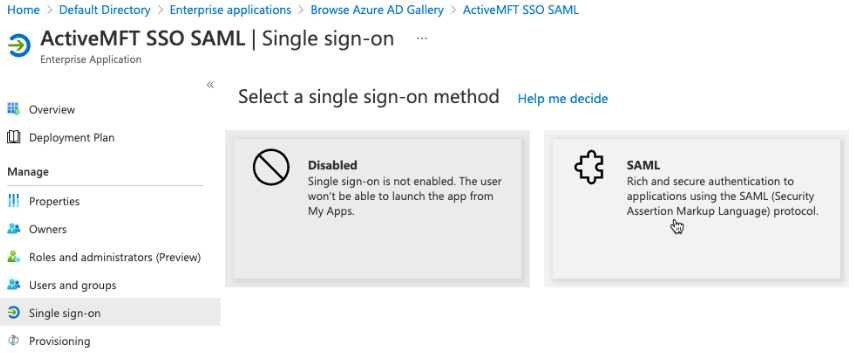
-
On the
Set up Single Sign-On with SAMLscreen, click on theEditbutton to the right of theBasic SAML Configurationsection.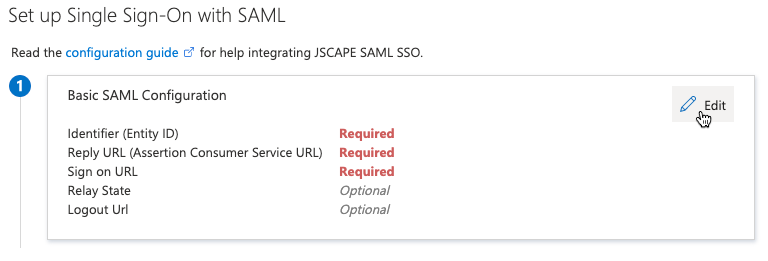
-
On the
Basic SAML Configurationscreen, replace "https://samltoolkit.azurewebsites.net" with "https://jscapehost/sso/jscapedomain/login" URL underIdentifier (Entity ID)list. Replace "jscapehost" and "jscapedomain" accordingly to what is appropriate for your ActiveMFT environment. Enter the same URL into theReply URL (Assertion Consumer Service URL)andSign on URLfields. Click theSavebutton.
-
It may be necessary to manually close the
Basic SAML Configurationscreen if it does not automatically close after clicking on theSavebutton. Click on theXbutton to do this.
-
If you get a message that states:
The default reply URL is missing from the list of reply URLs. Click here to fix it- as shown below - then click on that message.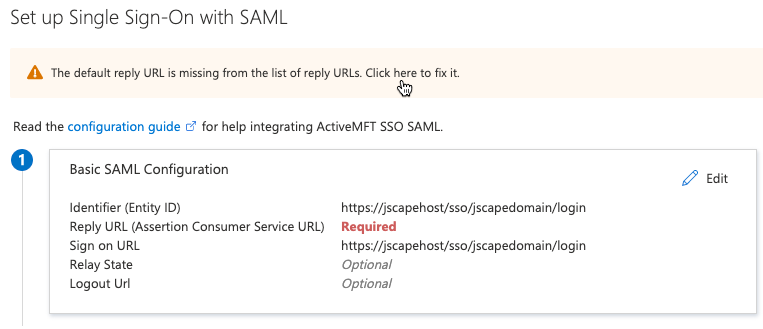
-
Once you are back on the
Set up Single Sign-On with SAMLscreen, click on theEditbutton to the right of theUser Attributes & Claimsheading.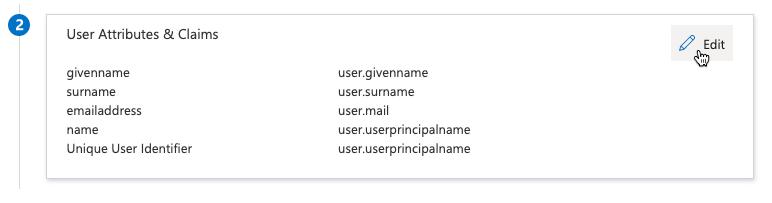
-
On the
User Attributes & Claimsscreen, click on the value beside theUnique User Identifier (Name ID)claim name. The default value isuser.userprincipalname [nameid-format:emailAddress] and it will becomeuser.mail [nameid-format:persistent]after making changes on the next screen.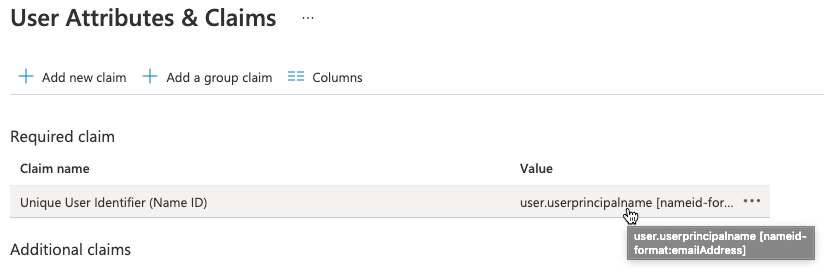
-
On the
Manage claimscreen, change theName identifier formatdropdown field fromEmail addresstoPersistentand change theSource attributedropdown field fromuser.userprincipalnametouser.mailthen click on theSavebutton.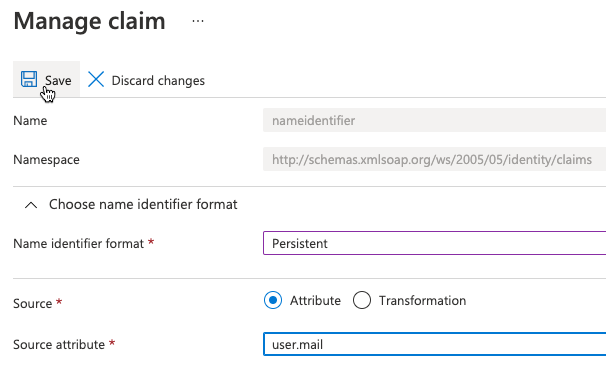
-
Click on the
SAML-based Sign-onlink once you are back on theUser Attributes & Claimsscreen.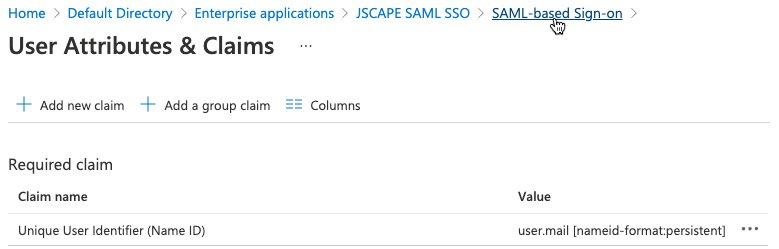
-
On the
SAML-based Sign-onscreen, click on theDownloadlink besideCertificate (Raw)field under theSAML Signing Certificatesection. The resulting certificate file will be used in the succeedingJSCAPE Configurationsection of this article.
-
Click on the
Copy to clipboardicon to the left of theLogin URLfield, located under theSet up <NAME>section. NAME will be whatever you entered in step 5. TheLogin URLwill be used in theJSCAPE Instructionssection located below.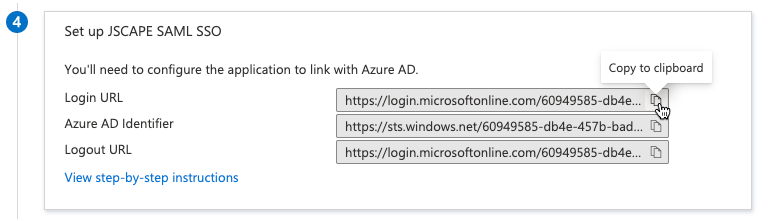
-
The final step requires that you add users and/or groups to the application. Click on the
Users and groupsitem under theManagesection, then click on theAdd user/groupbutton. Proceed to add users/groups.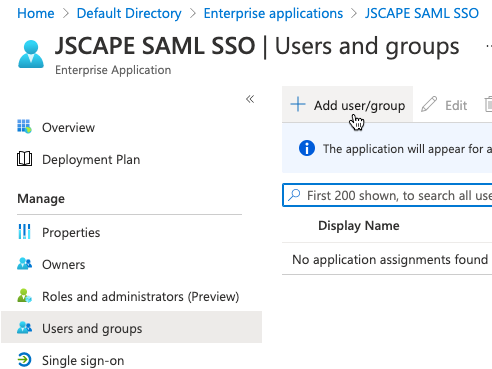
JSCAPE Instructions
-
Launch the MFT Server Administrative UI. Navigation to the
Keys > Host Keysmodule, then click on theImportbutton and selectImport File. -
On the
Import Public Keydialog, enter an appropriate alias in theKey aliasfield. It could be anything. Click on theChoose Filebutton and find the certificate file you downloaded in step 16, then click on theOKbutton. -
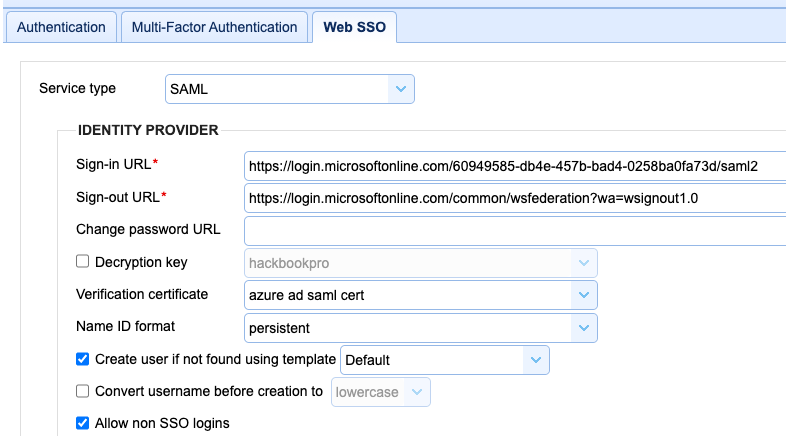
Open the appropriate domain and go to
ACCOUNTS > Authentication > Web SSOpage. ChooseSAMLfrom theService typedropdown list. -
Under the
IDENTITY PROVIDERsection, theSign-in URLshould be set to theLogin URLcopied from step 17. TheSign-out URLshould be set to "https://login.microsoftonline.com/common/wsfederation?wa=wsignout1.0". TheVerification certificatedropdown list should be set to the certificate imported in step 2. TheName ID formatdropdown list should be set topersistent. The rest of the fields can be left to their default values. Click on theApplybutton.
Test SSO login by accessing the URL: https://jscapehost/sso/jscapedomain/login
Replace "jscapehost" and "jscapedomain" accordingly.