Authentication
The Administrators > Authentication tab provides Single Sign-on (SSO) configuration options, a method by which users can log in to one service (identity provider) and automatically be granted access to other services (service provider) without the need to log in separately to the other services.
MFT Gateway provides support for SSO using SAML and Open ID Connect compliant identity providers.
The image below depicts how to navigate to SSO Authentication. Click on Administrators option, then click on the Authentication tab. If SSO authentication has not yet been established, click on the Edit button. The SSO Authentication dialog will appear. From the dropdown, select SAML or Open ID Connect. Please consult the documentation of your identity provider for details on how to enable/configure SSO. An Okta example is provided below (see Okta Example Using SAML). In addition, the OpenID Connect fields are described below. In this description you will also find a note pertaining to Google when it is used with OpenID Connect.

Note: If you have the need to reset the SSO authentication type back to "None", follow the command-line instructions below:
-
Navigate to the MFT Gateway installation directory.
-
Execute the command:
reset-administrator-authentication. -
Restart MFT Gateway server.
Okta Example Using SAML
Okta is an identity management service. It gives users access to various software with one successful Okta log in. This example provides step-by-step instructions on how to set up the application in Okta and in the MFT Gateway Manager user interface. When complete, an MFT Gateway administrator will be able to log in to the MFT Gateway Manager application using Okta. The images provided under the Okta Instructions are taken from the Okta Admin console. Most images are snippets and not the complete page.
Okta Admin Instructions
-
Sign in to the Okta admin console.
-
Using the left sidebar menu, navigate to Applications > Applications.
-
Click on the Create App Integration button.
-
A Create a new app integration dialog will pop up. Select the SAML 2.0 option, then click Next.
In the CreateSAML Integration dialog:
-
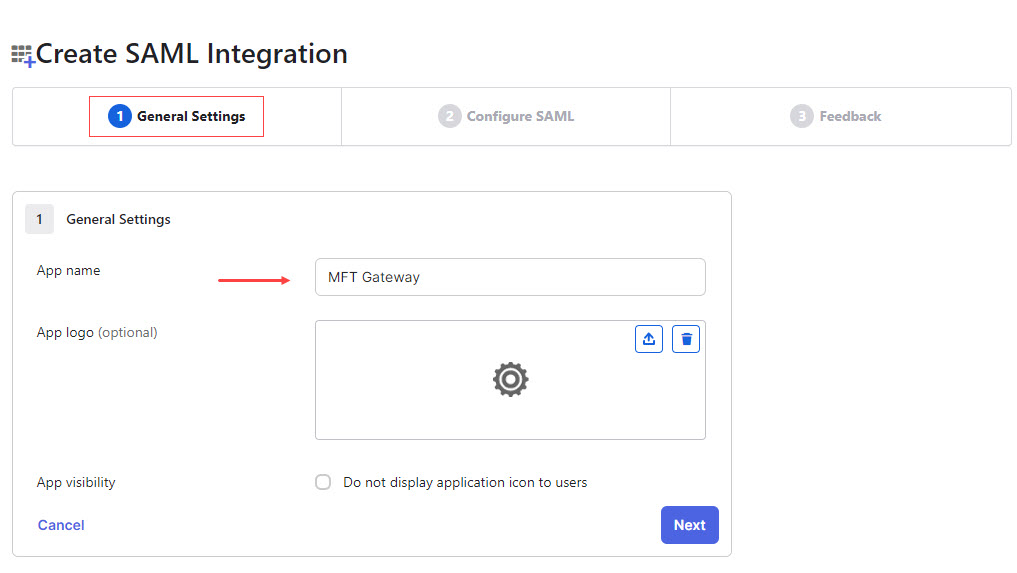
(1) General Settings - enter an App name (for example: MFT Gateway). See the image below. Click Next.
-
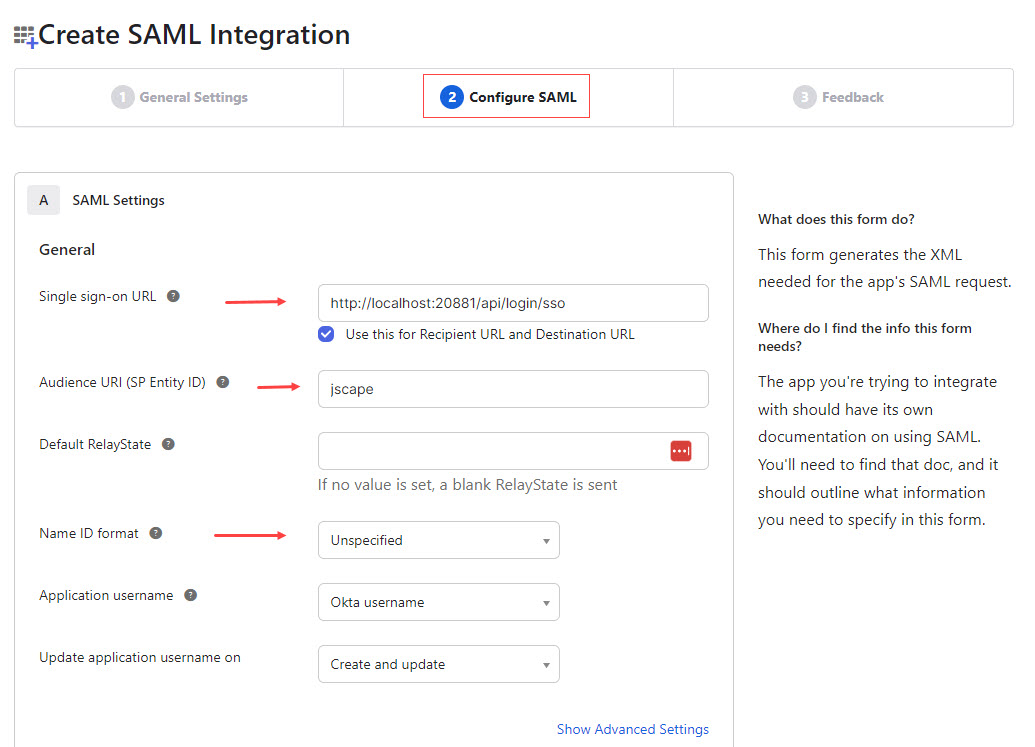
(2) Configure SAML, enter values for the following. See the image below.
Single sign-on URL - use the URL format: http://<hostname>:<gateway_port>/api/login/sso.
For example: http://localhost:20881/api/login/sso.
Audience URI (SP Entity ID) - any ID (for example: jscape).
Name ID format - This value should remain Unspecified. Click Next.
-
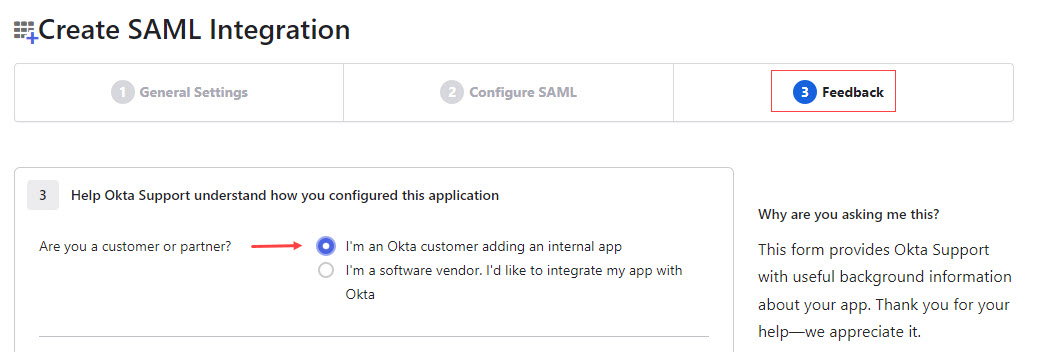
(3) Feedback - select I'm an Okta customer adding an internal app, then click Finish. See the image below.
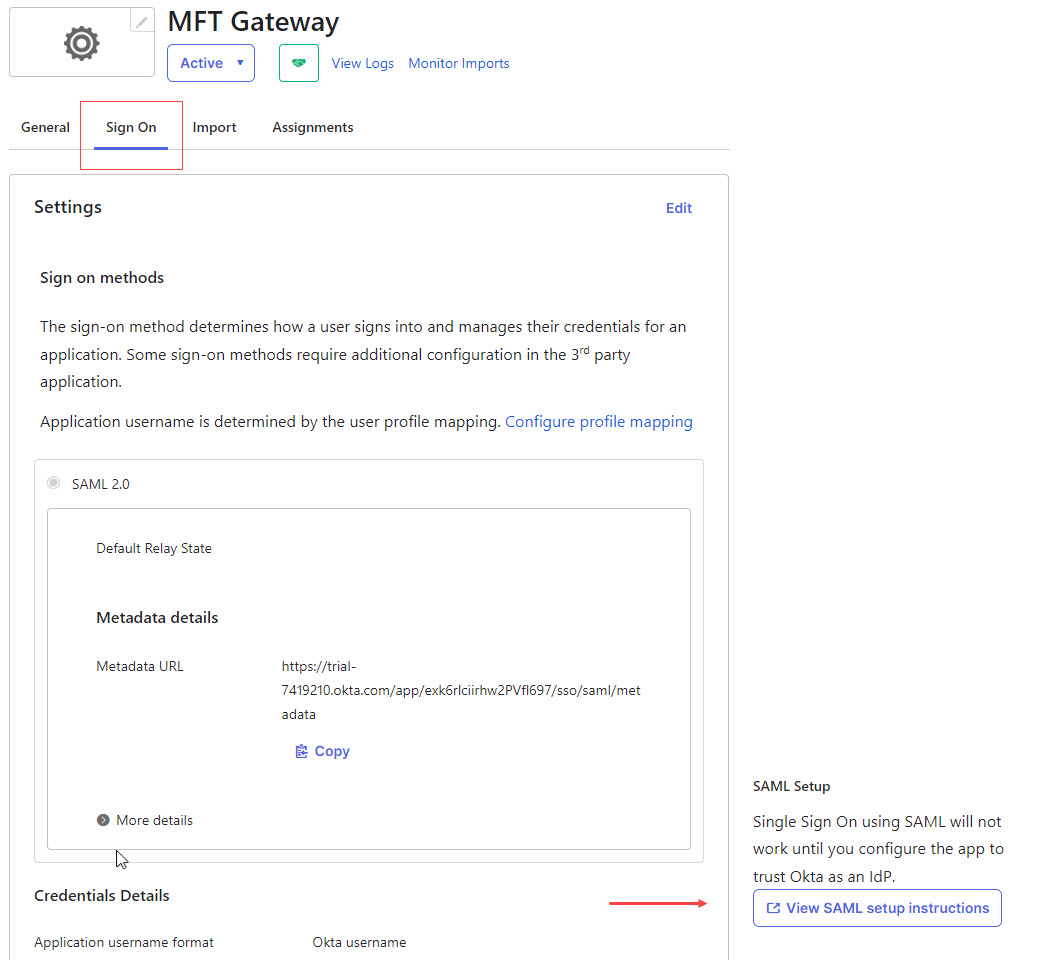
The page will refresh displaying the App name you entered previously, and the Sign On tab will be active. See the image below.
-
On this page, scroll down until you see the SAML Setup heading. Click on View SAML setup instructions.
-
A new page will open with Idp details. Copy the Identity Provider Single Sign-On URL value and download the X.509 Certificate (click the Download Certificate button). You will need the URL and certificate when configuring Okta in the MFT Gateway Manager UI.
-
Using the left menu, navigate back to Applications > Applications.
-
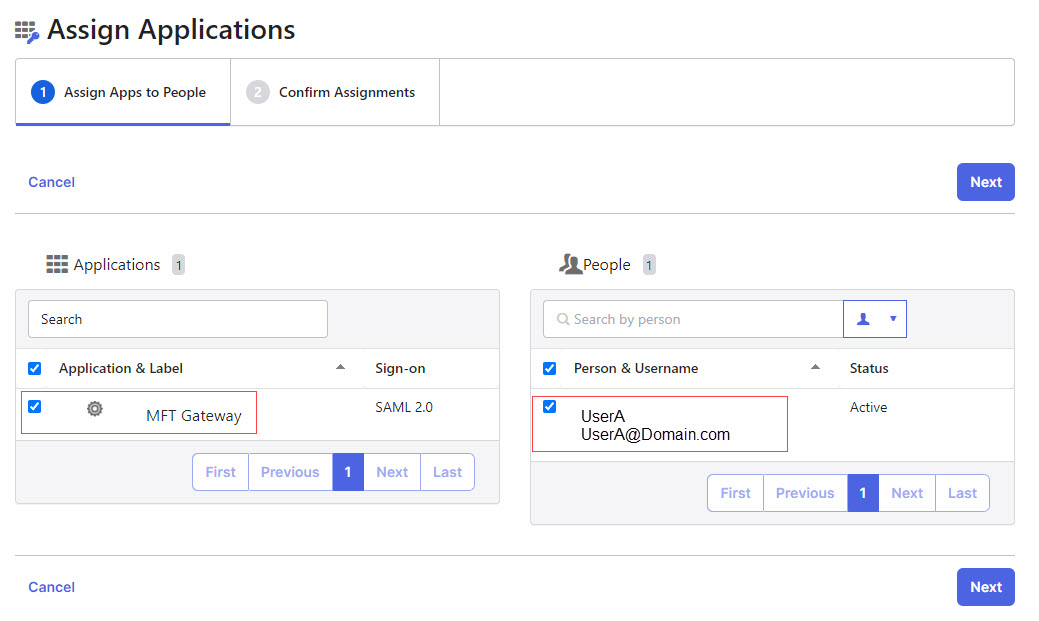
Click the Assign Users to App button. Check the following: (See the image below).
Under the Application & Label list, check the application you specified in Step 5 (click the checkbox).
Under the Person & Username, check the user who will be accessing the MFT Gateway Manager user interface (click the checkbox).
-
Click Next, then click the Confirm Assignments button.
This completes the Okta configuration.
MFT Gateway Manager Instructions
-
Login to the MFT Gateway Manager user interface.
-
Navigate to
Administrators > Administratorstab. -
Add an admin user with the following details:
-
Name: <User name in Okta application> , for example “UserA@Domain.com”
-
Password: <User password in Okta>
-
Can manage administrators: checked
-
Enabled: checked
-
Note! The following steps are very important, otherwise Idp authentication will fail with error “Entity Not Found”
-
Navigate to
Administrators > Authenticationtab. -
Click on the
Editbutton. -
Select
SAMLfrom the SSO type dropdown. -
Enter the values as follows: (See the image below).
Sign-in URL: Paste the URL you copied in Step 9 of the Okta instructions.
Sign-out URL: Enter the desired sign-out URL. For example: http://localhost:20881.
Verification Certificate: Copy the X.509 Certificate contents that you downloaded in Step 9 of the Okta instructions and paste it into this field. See the image below.
Allow non SSO Logins: If checked, an Admin may login using either SSO or another authentication service. This can remain unchecked if you only wish to use SSO authentication.

-
Click the
Savebutton -
Access MFT Gateway SSO URL with this format: http://[hostname:gateway_port]/api/login/sso
For example: http://localhost:20881/api/login/sso and authenticate with the Okta identity provider. See the image below.

OpenID Connect
When OpenID Connect is selected, the Open ID Connect Authentication dialog will appear. Below you will find a description of the fields.
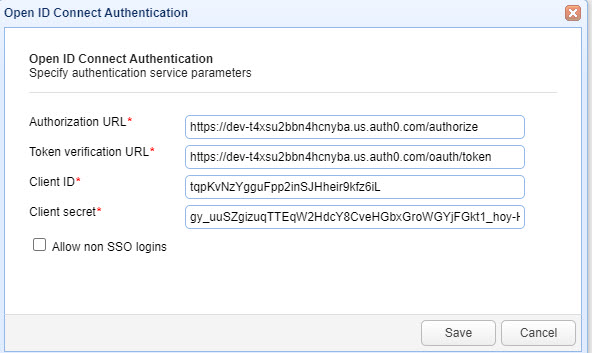
Authorization URL: The URL used for signing into the identity provider.
Token verification URL: The URL for verifying tokens.
Client ID: Your client ID for connecting with identity provider.
Client secret: Your client secret for connecting with identity provider.
Allow non SSO logins: - If enabled, an Admin may login using either SSO or another authentication service.
Google Note: If you use Google with OpenID Connect, the MFT Gateway Administrator account, configured in the Administrators > Administrators tab, must use Google's sub value in the Login field. If you use an email address, the log in will fail with an "ENTITY_NOT_FOUND" error message (posted in the Administrators > Log records). The error description will look something like this: "Administrator '874400993333982372832' not found." where the number in the error description is the sub value. Click on this google link for more information: openid-connect